Visiting timetableClosed
|Thursday, April 30, 2026Piazza Municipio, 80133 Napoli (NA), Italy
Back to photography
viewpoints
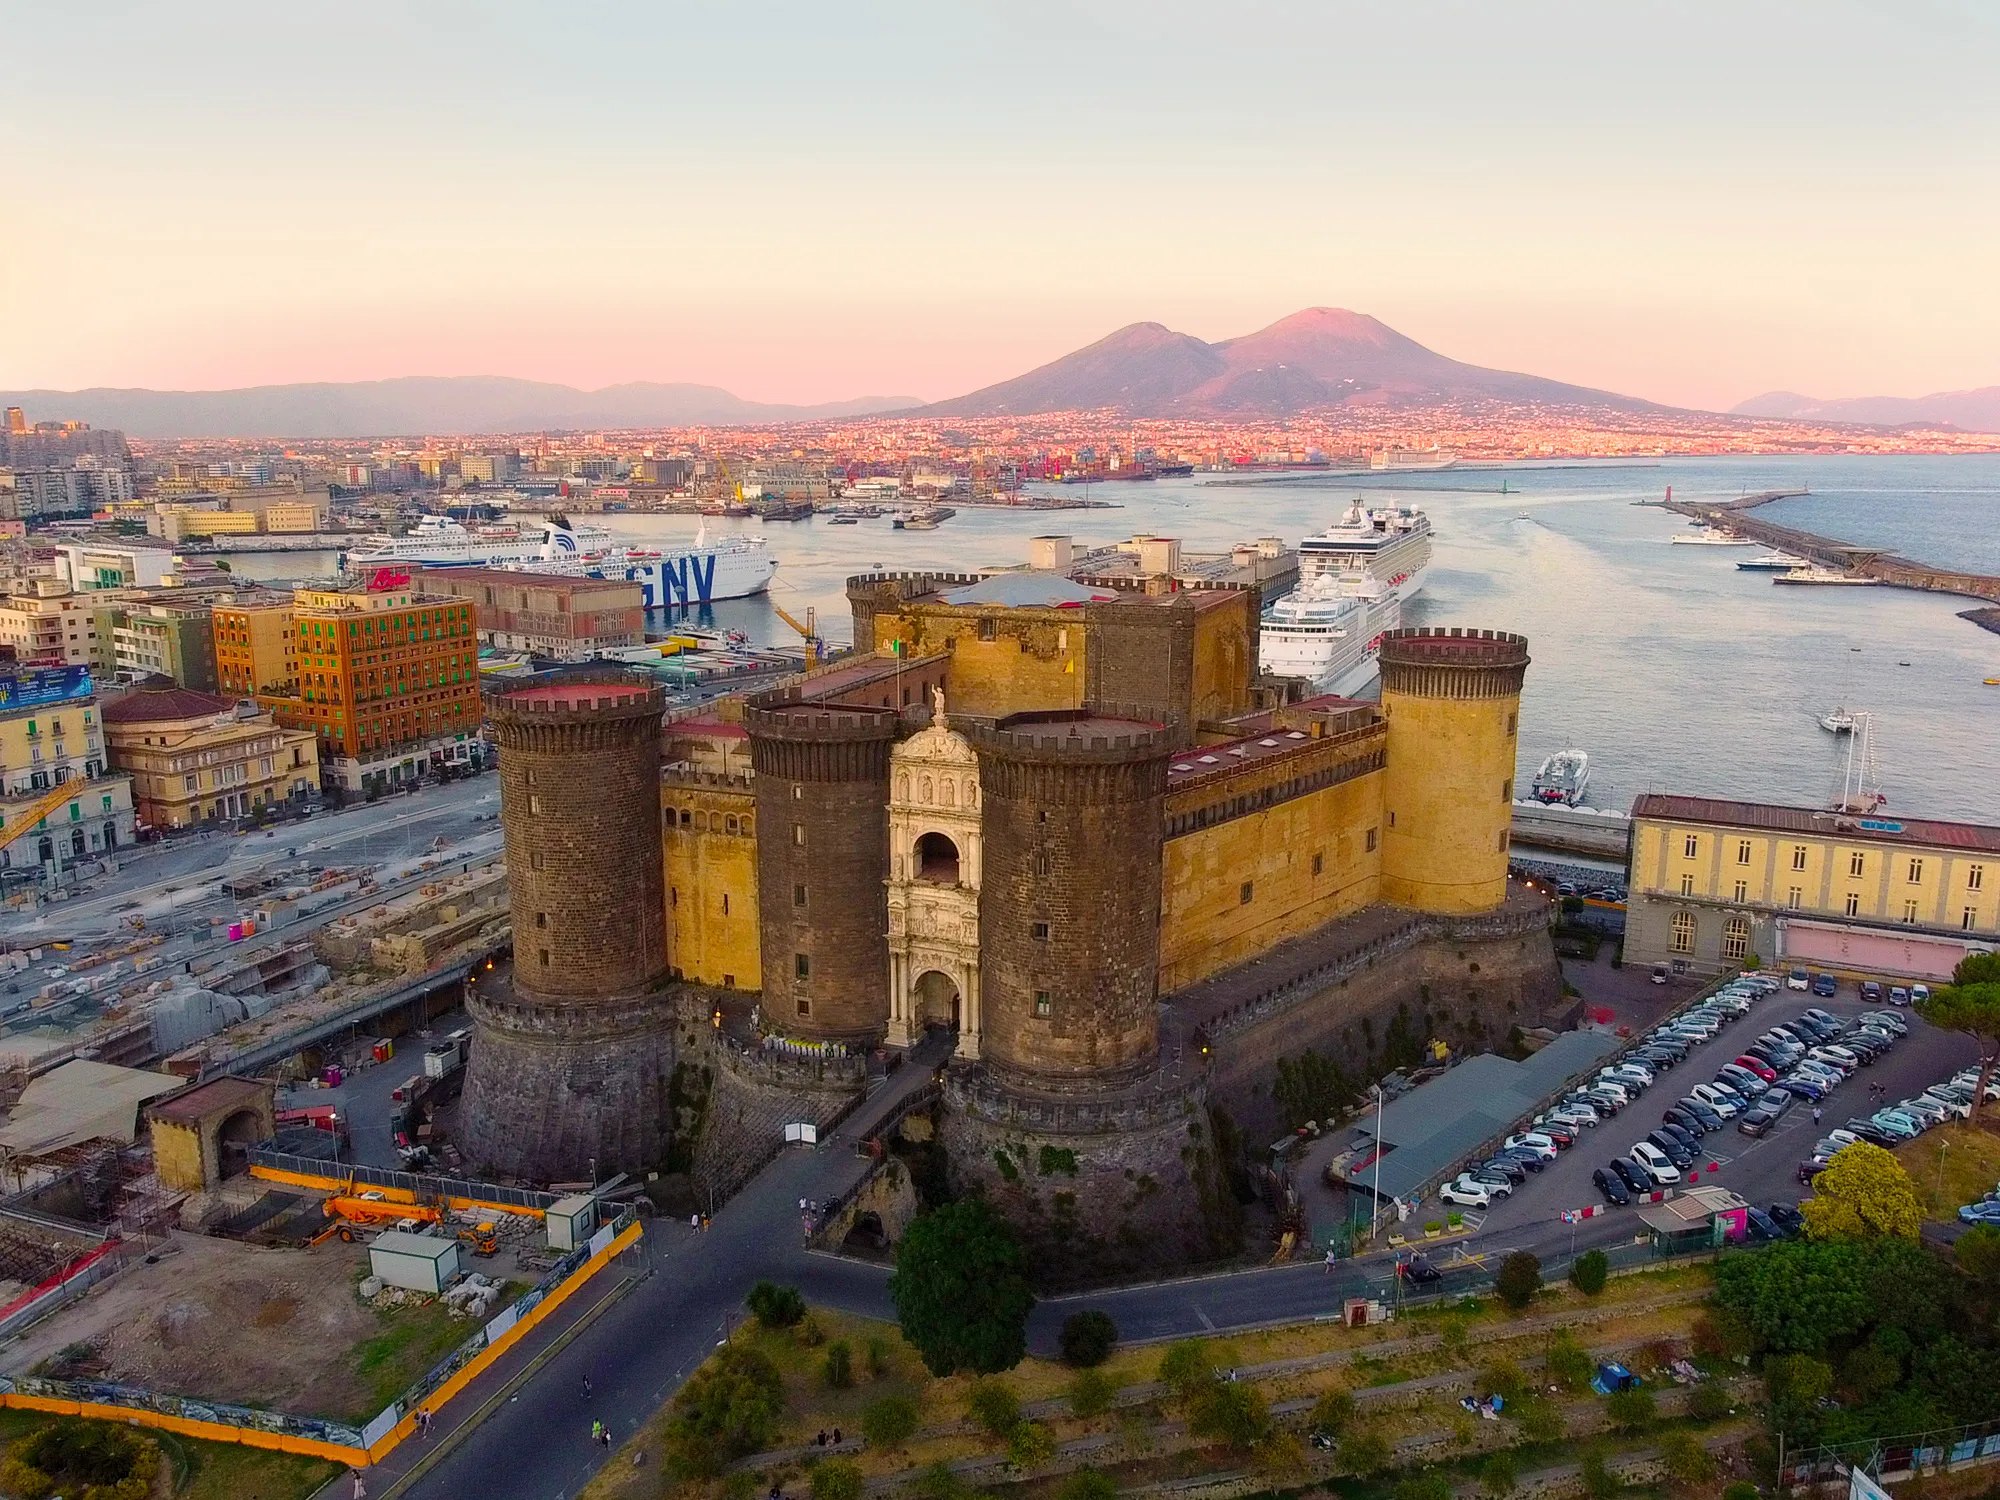
Best Views – Castel Nuovo Rooftops and Terraces
A quick guide to Castel Nuovo’s best viewpoints with composition notes for the harbor and Vesuvius backdrops.
1/8/2026
12 min read

On the terrace, breathe — the city and the bay sync in one frame.
Table of Contents
- Where to stand (vantages)
- Composition frameworks
- Light by hour
- Gear and mobile tips
- Wind and safety
- Shot list
- Mini FAQ
Where to Stand (Vantages)
- Corner terraces for layered depth of towers and harbor.
- Central railings for symmetrical frames.
- Elevated steps (where allowed) for cleaner horizons.
Composition Frameworks
- Anchor-and-flow: place a tower at a third; let ferry lines flow.
- Graphic center: arch centered with balanced sky mass.
- Silhouette: reduce detail, emphasize outlines at dusk.
Light by Hour
- Morning: cool contrast, crisp textures.
- Late afternoon: warm stone, long shadows.
- Blue hour: graphic outlines against deepening sky.
Gear and Mobile Tips
- Lenses: wide-to-normal works best; avoid extreme distortion unless intentional.
- Mobile: use gridlines and exposure slider; hold steady on railings (where permitted).
Wind and Safety
- Secure hats and straps; gusts can surprise.
- Respect barriers; no leaning beyond edges.
Shot List
- Harbor panorama with Vesuvius.
- Tower detail juxtaposed with skyline.
- Ferry movement as time-lapse sequence.
Image Highlights
Mini FAQ
Tripods allowed?
Often restricted on terraces; check policy and be considerate of others.Best single vantage?
Corner terraces give depth and harbor context in one frame.Bottom Line
The view alone justifies the climb — photograph with patience.
About the Author

Viewfinder
I built this to help you explore smarter—clear routes, better timing, and context that makes a fortress feel alive with ceremony and craft.
Tags
viewpoints
rooftop
Vesuvius
harbor
Comments (0)
Leave a Comment
Loading comments...